


Description
Compact ESP32 Supermini Development Boards for IoT, Wearables & Embedded Systems
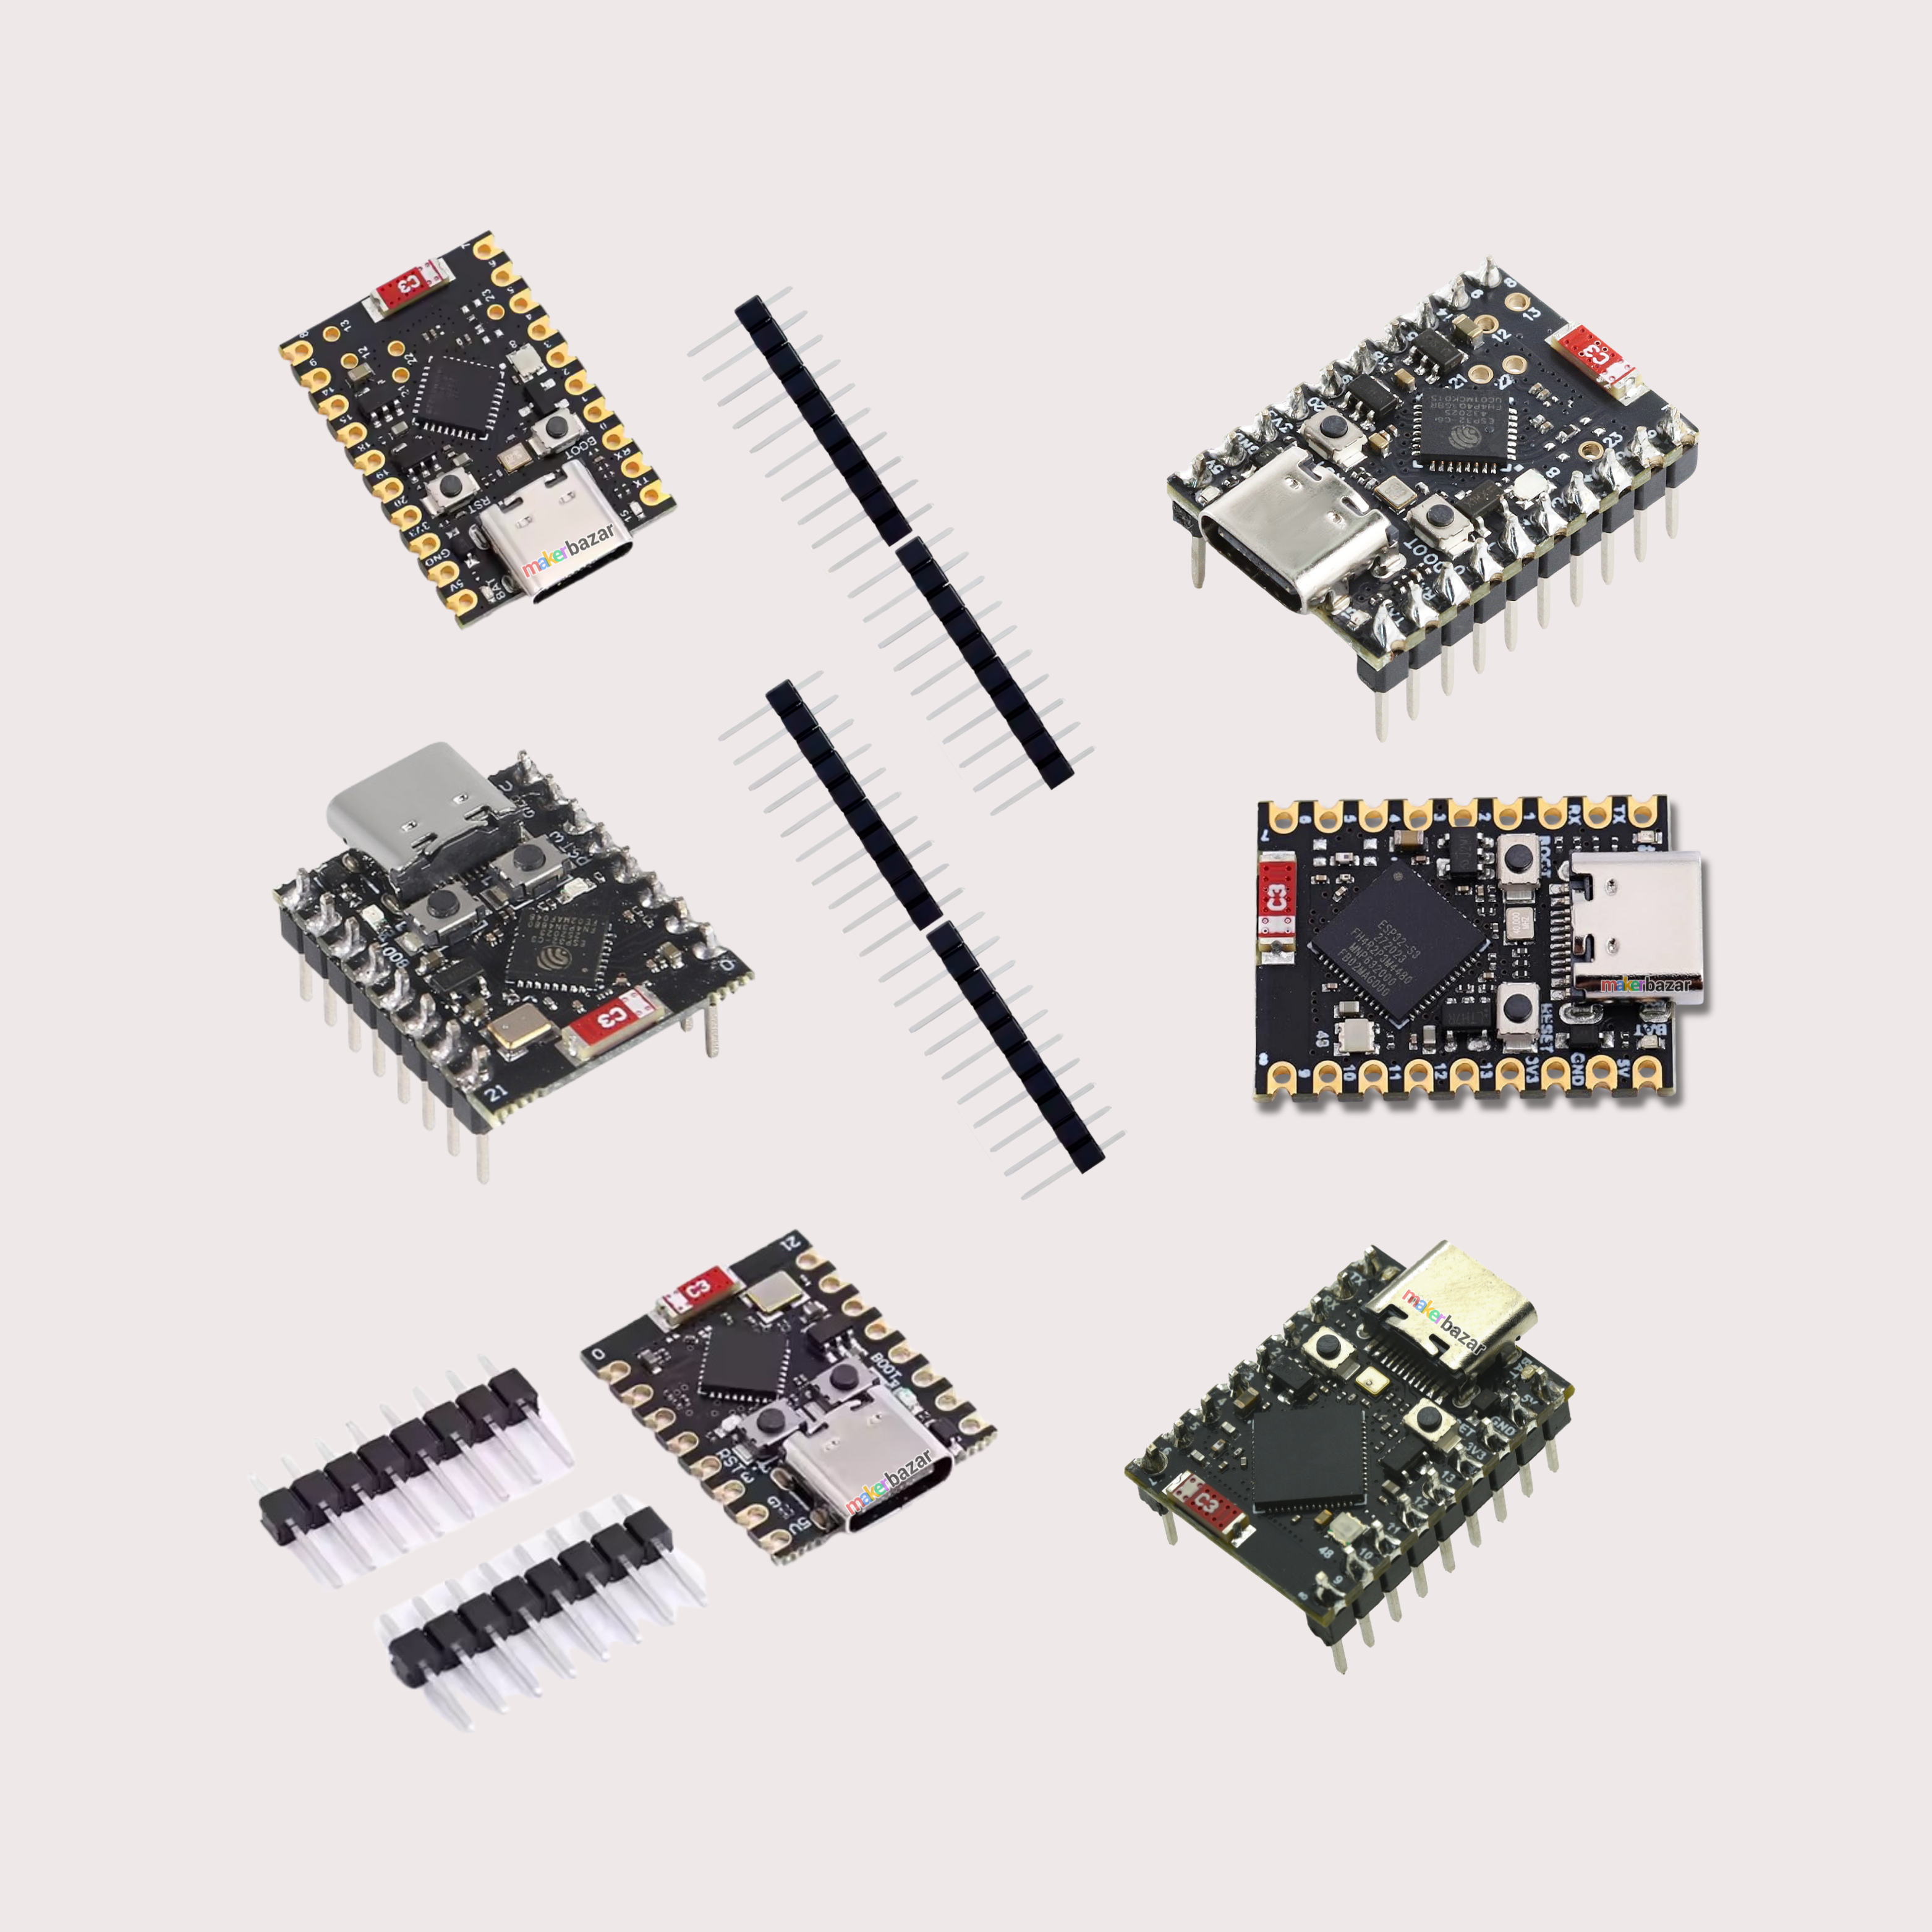
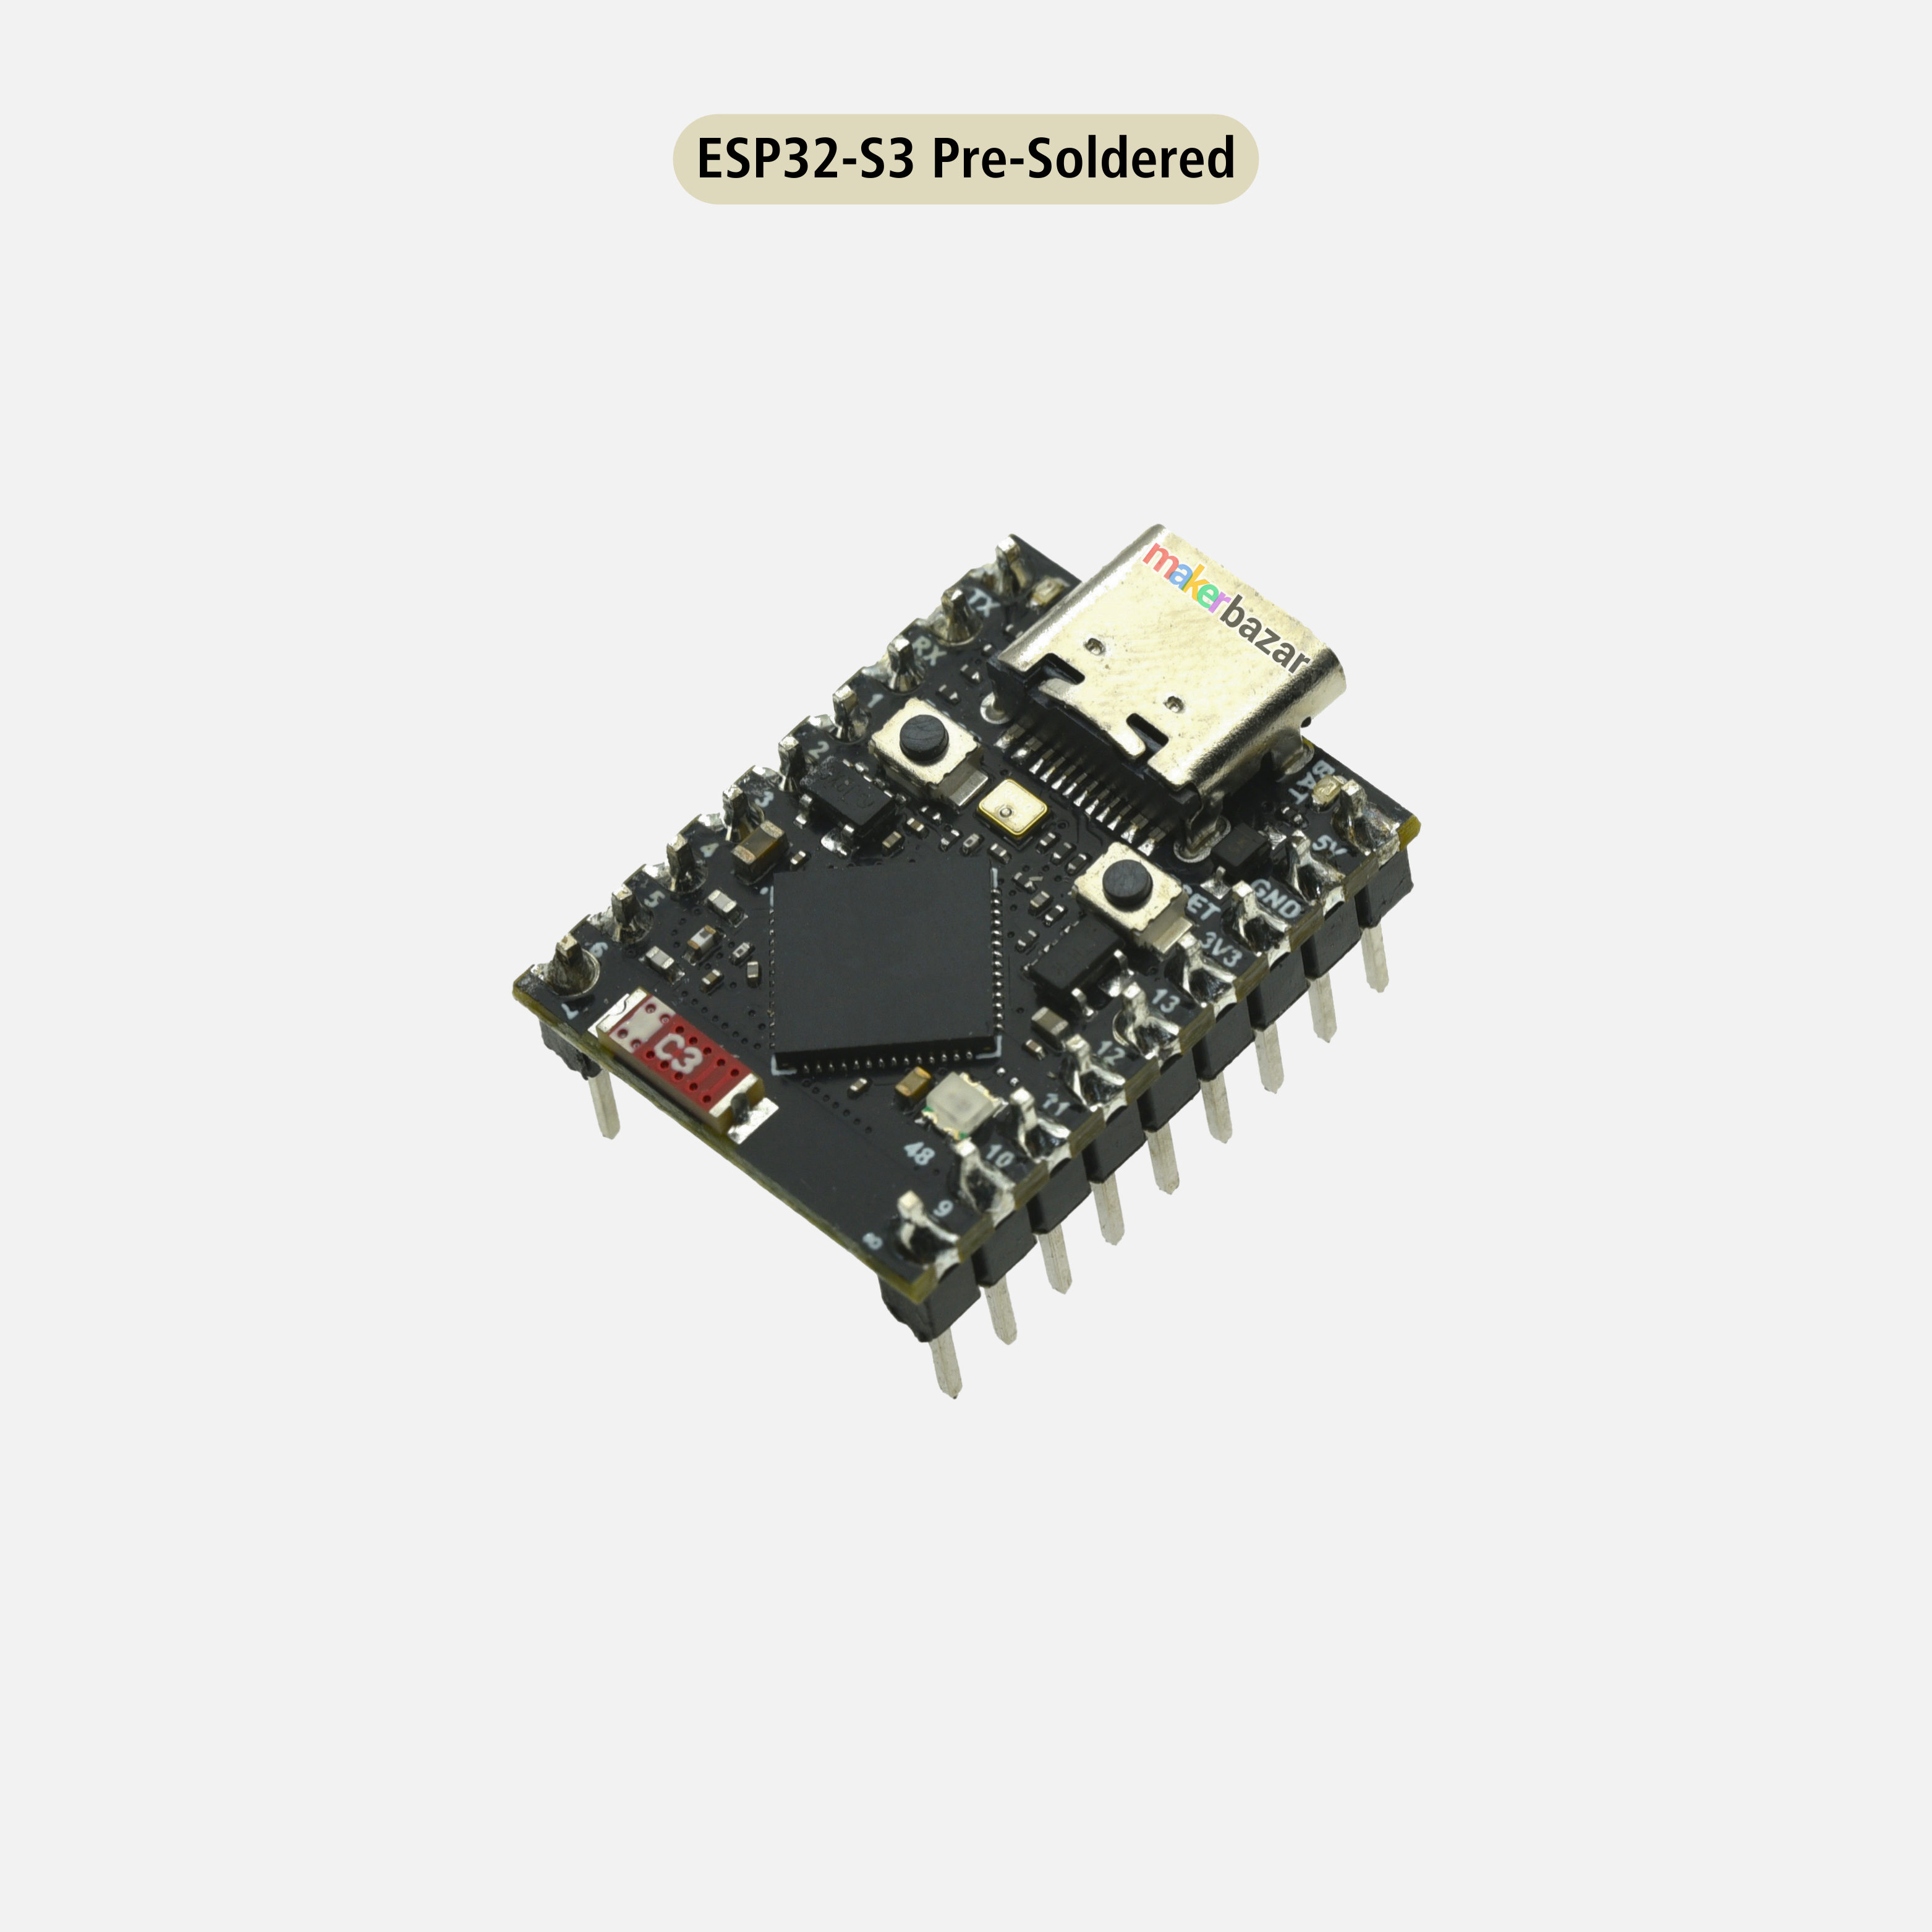
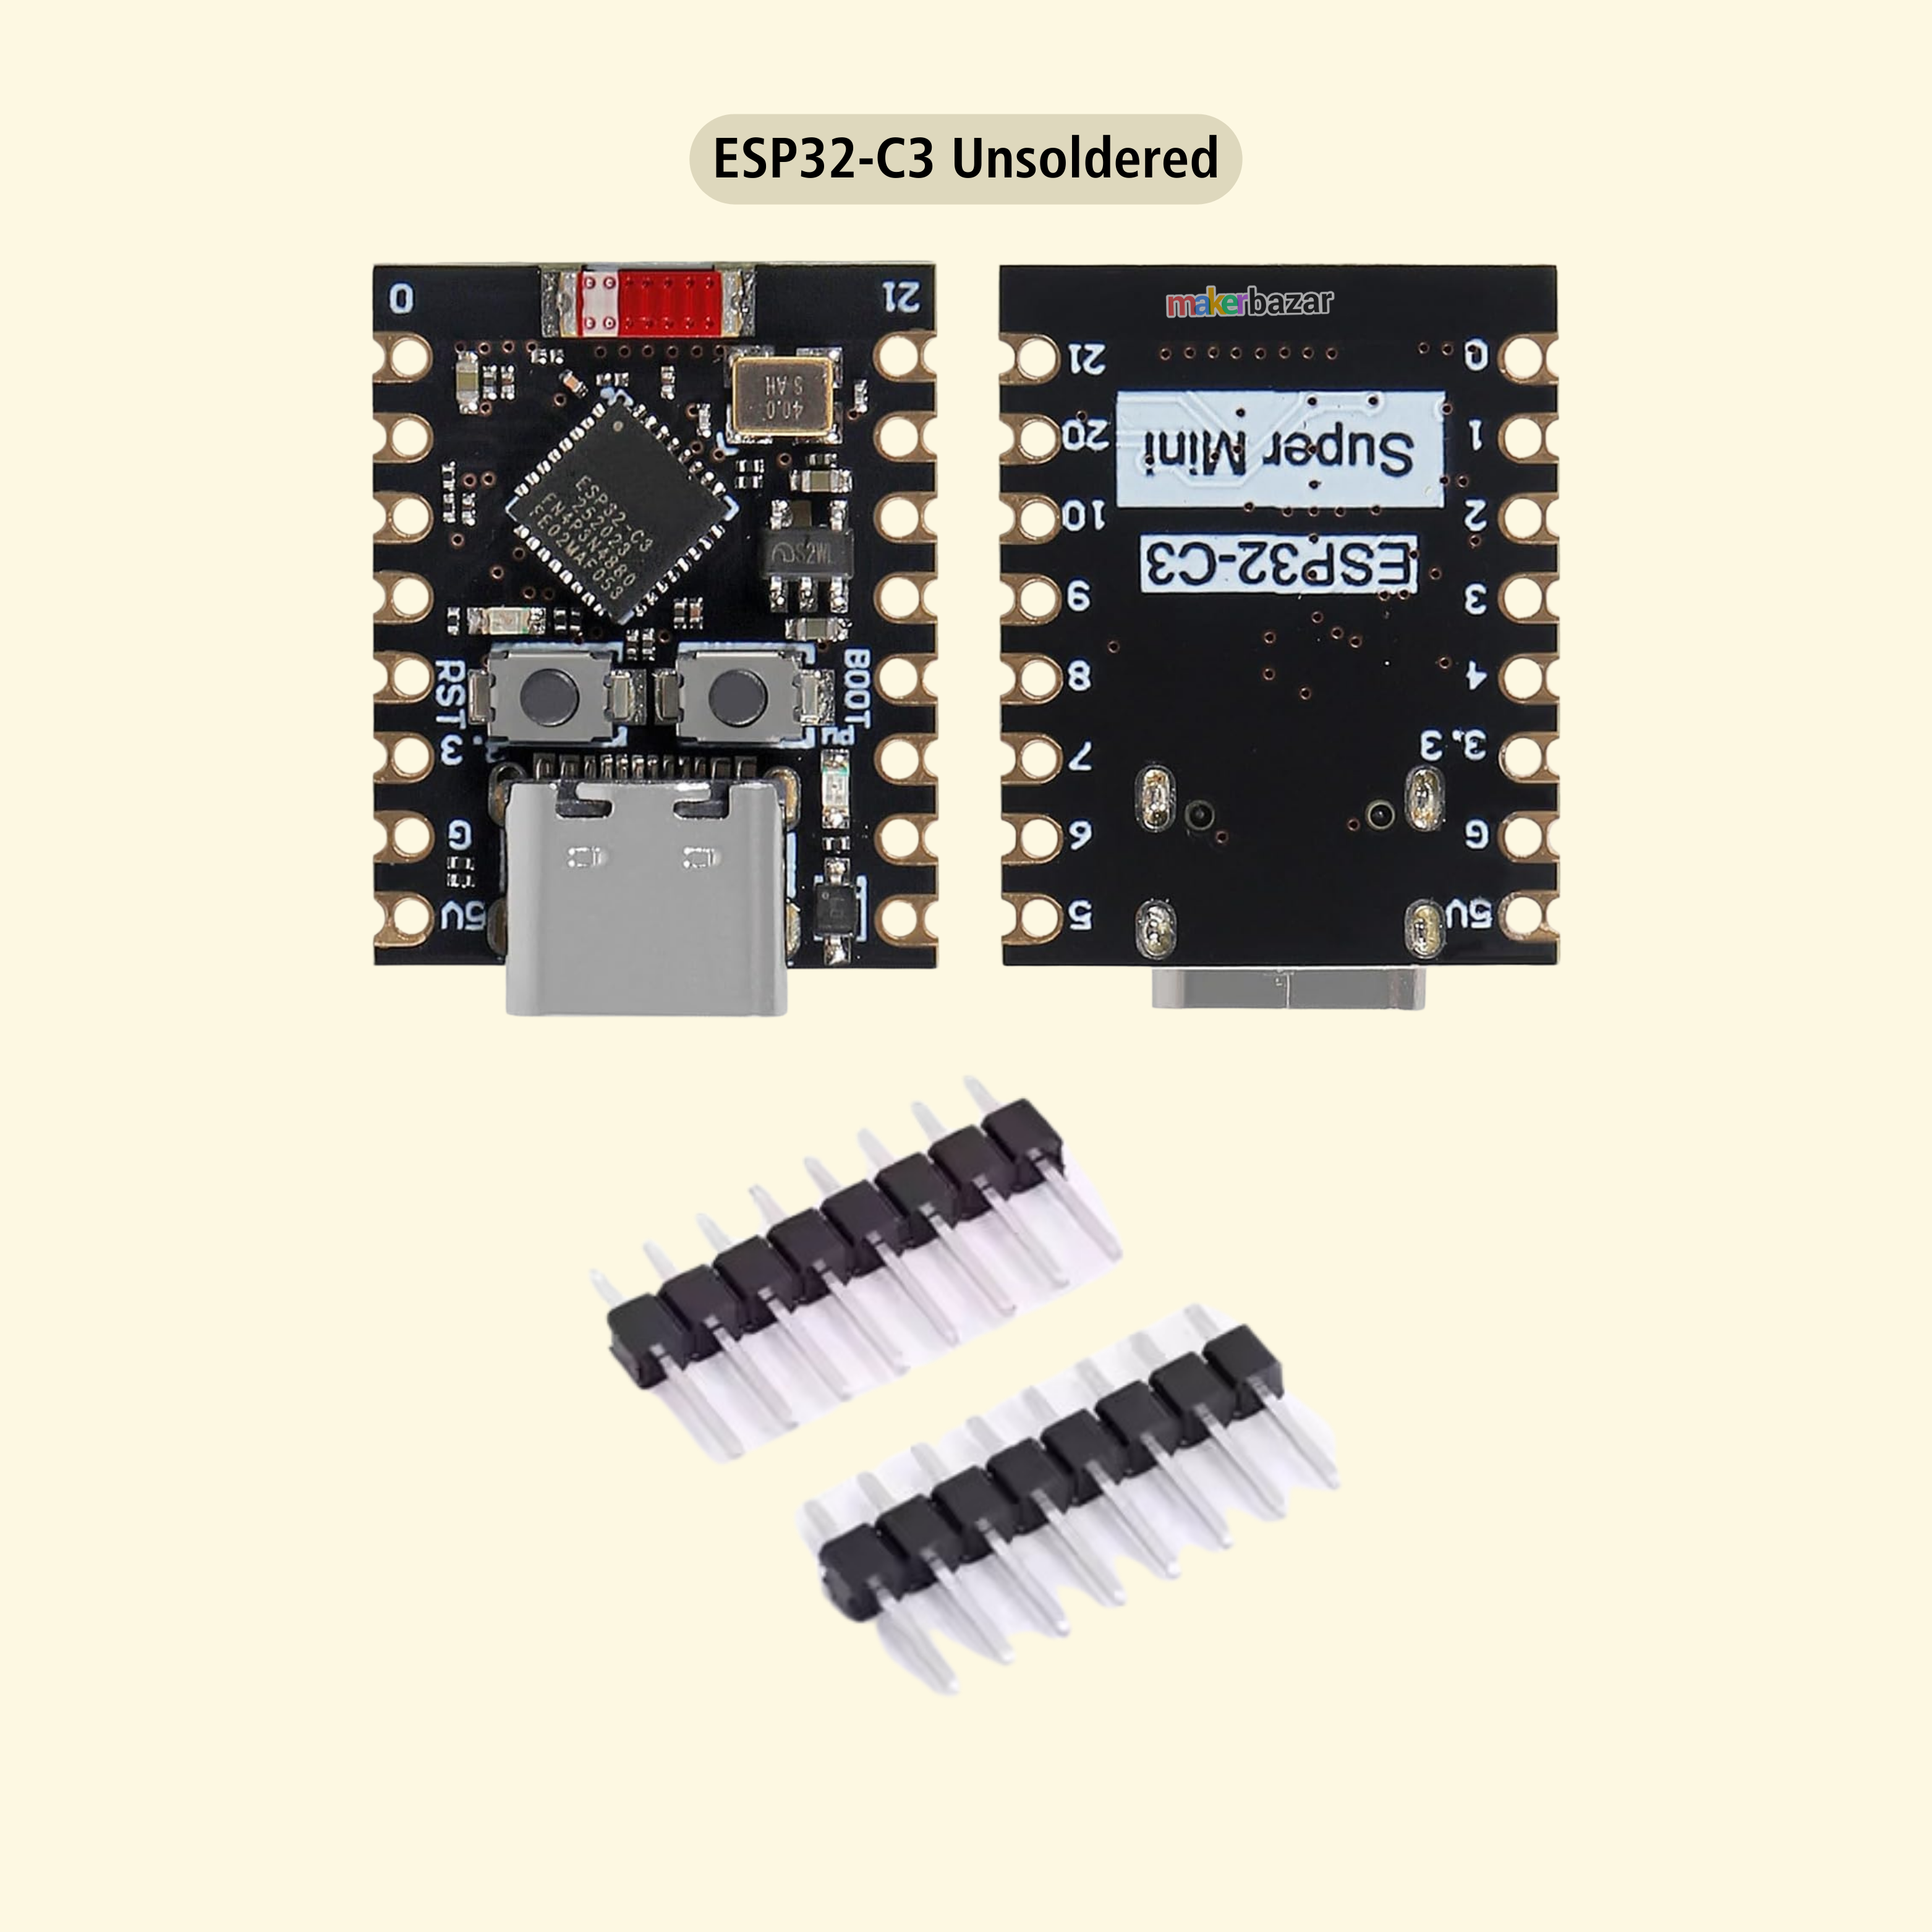
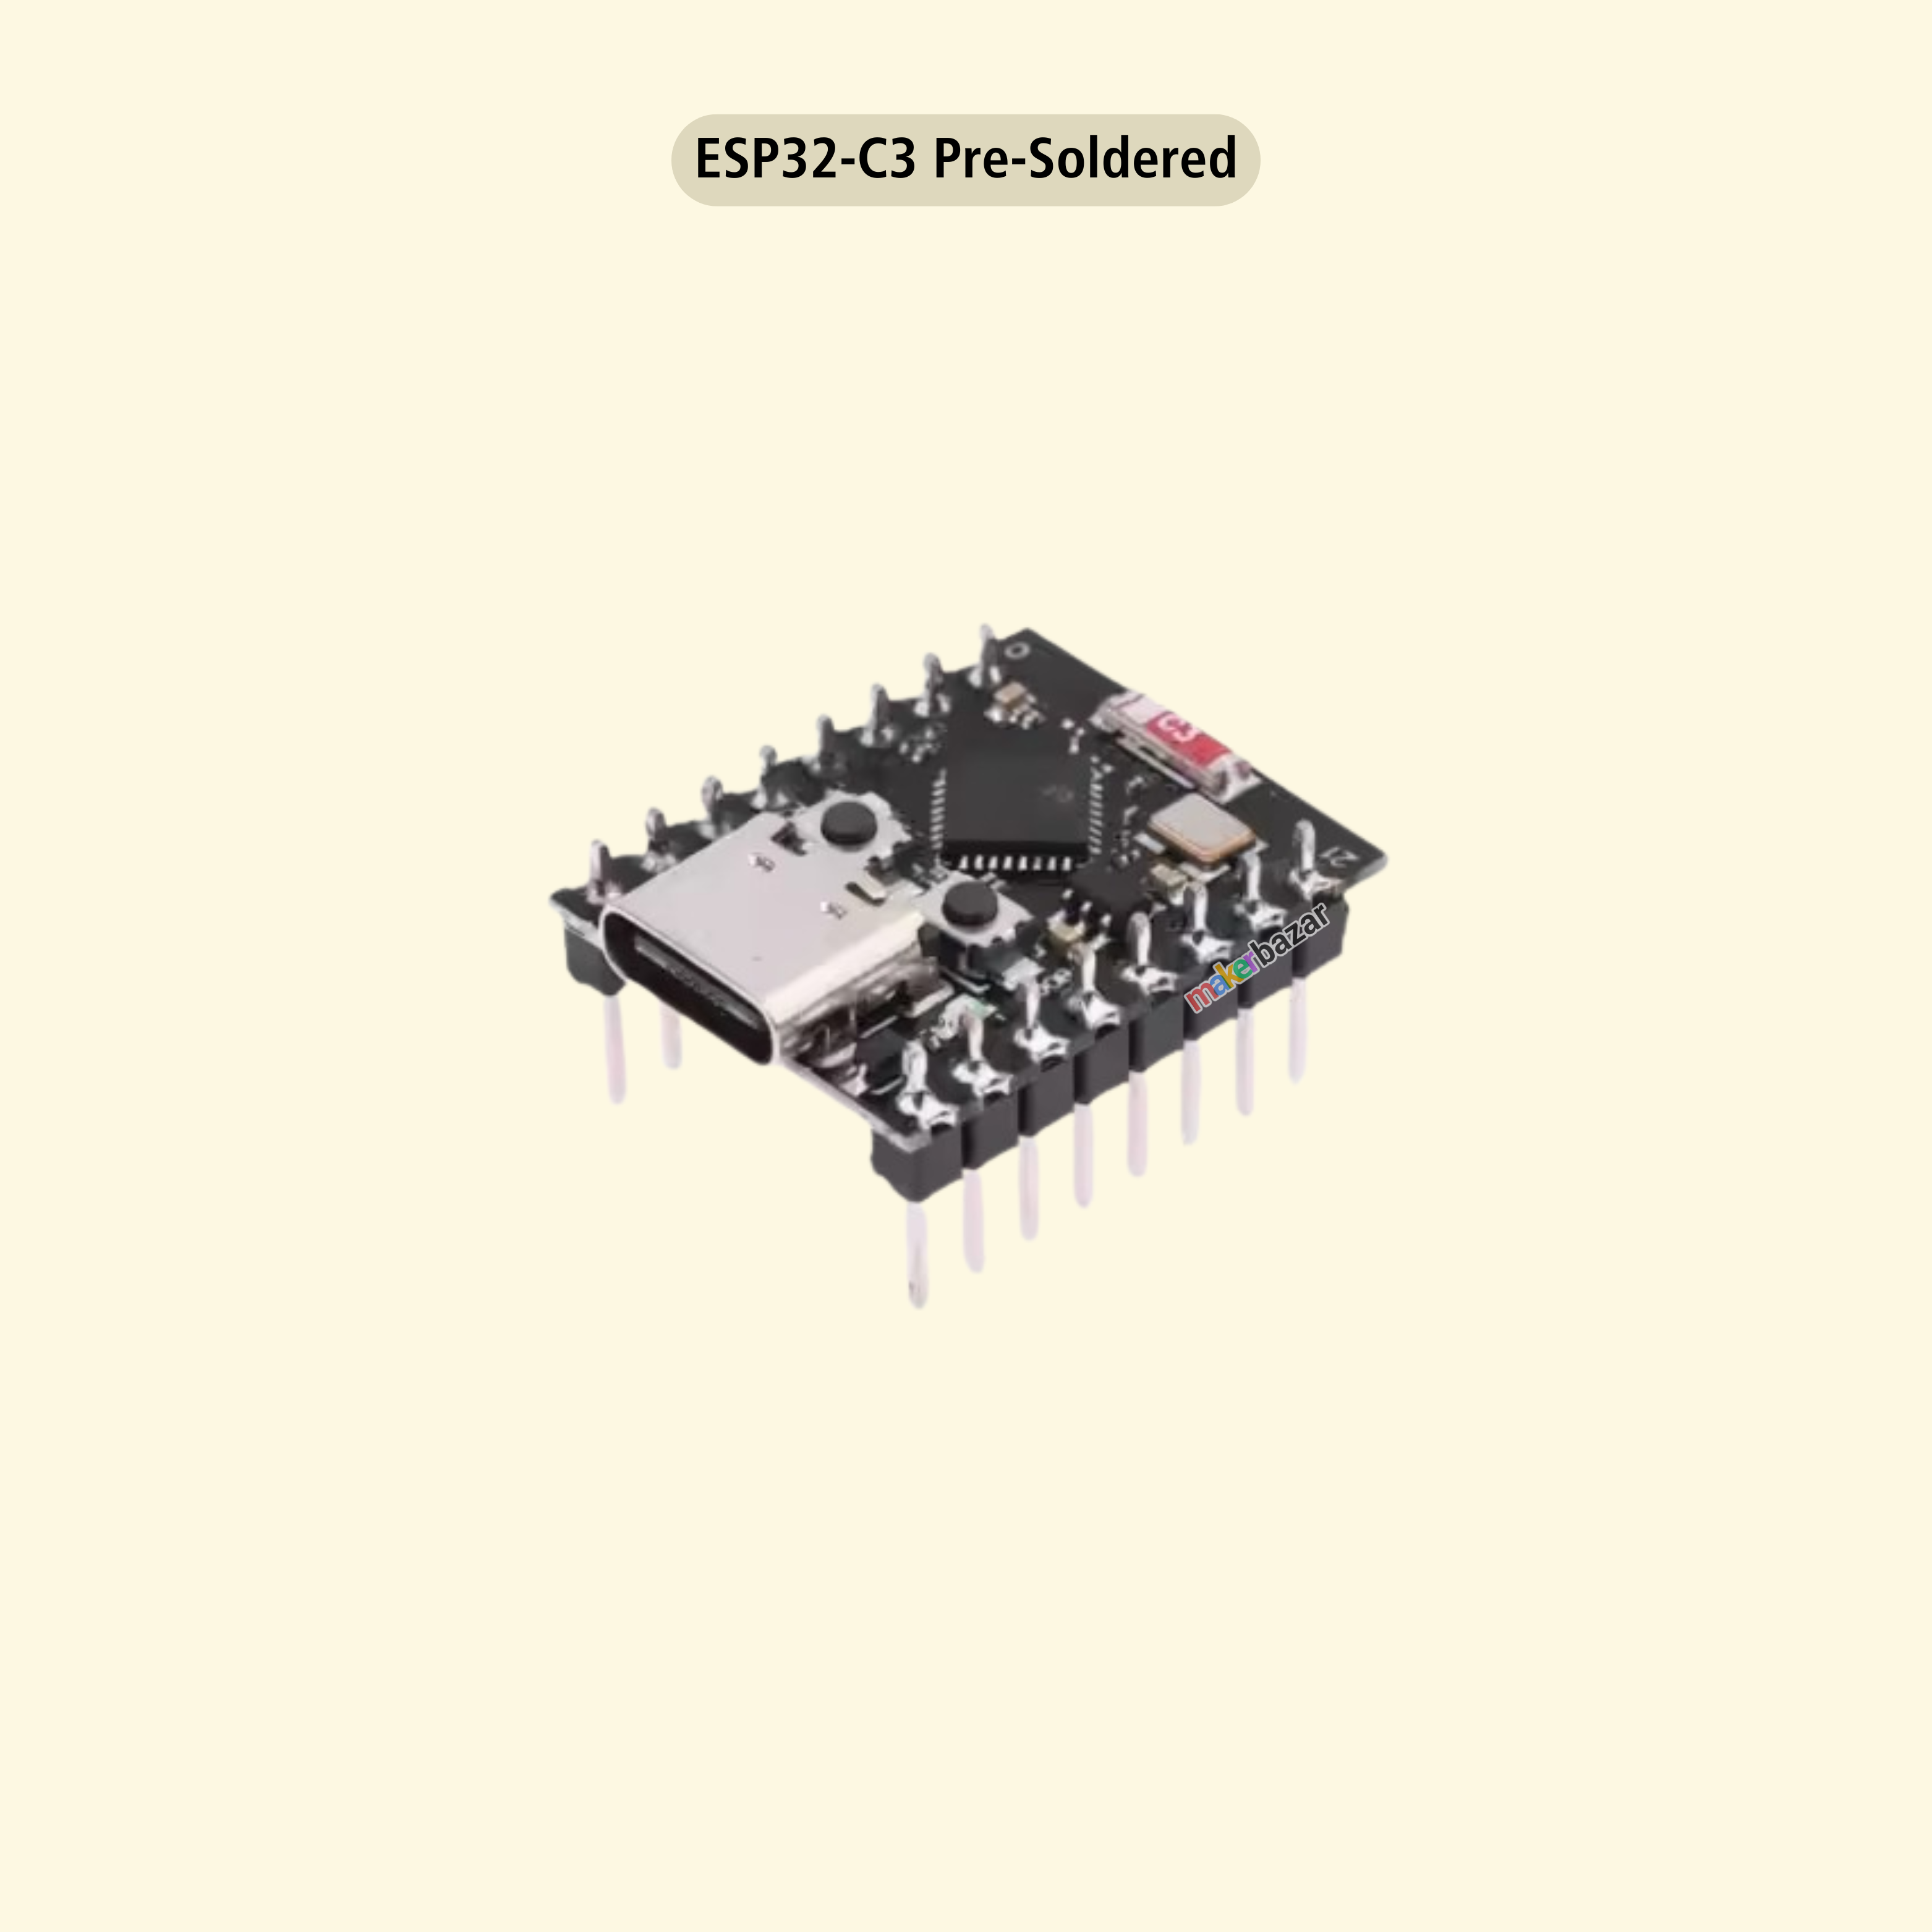
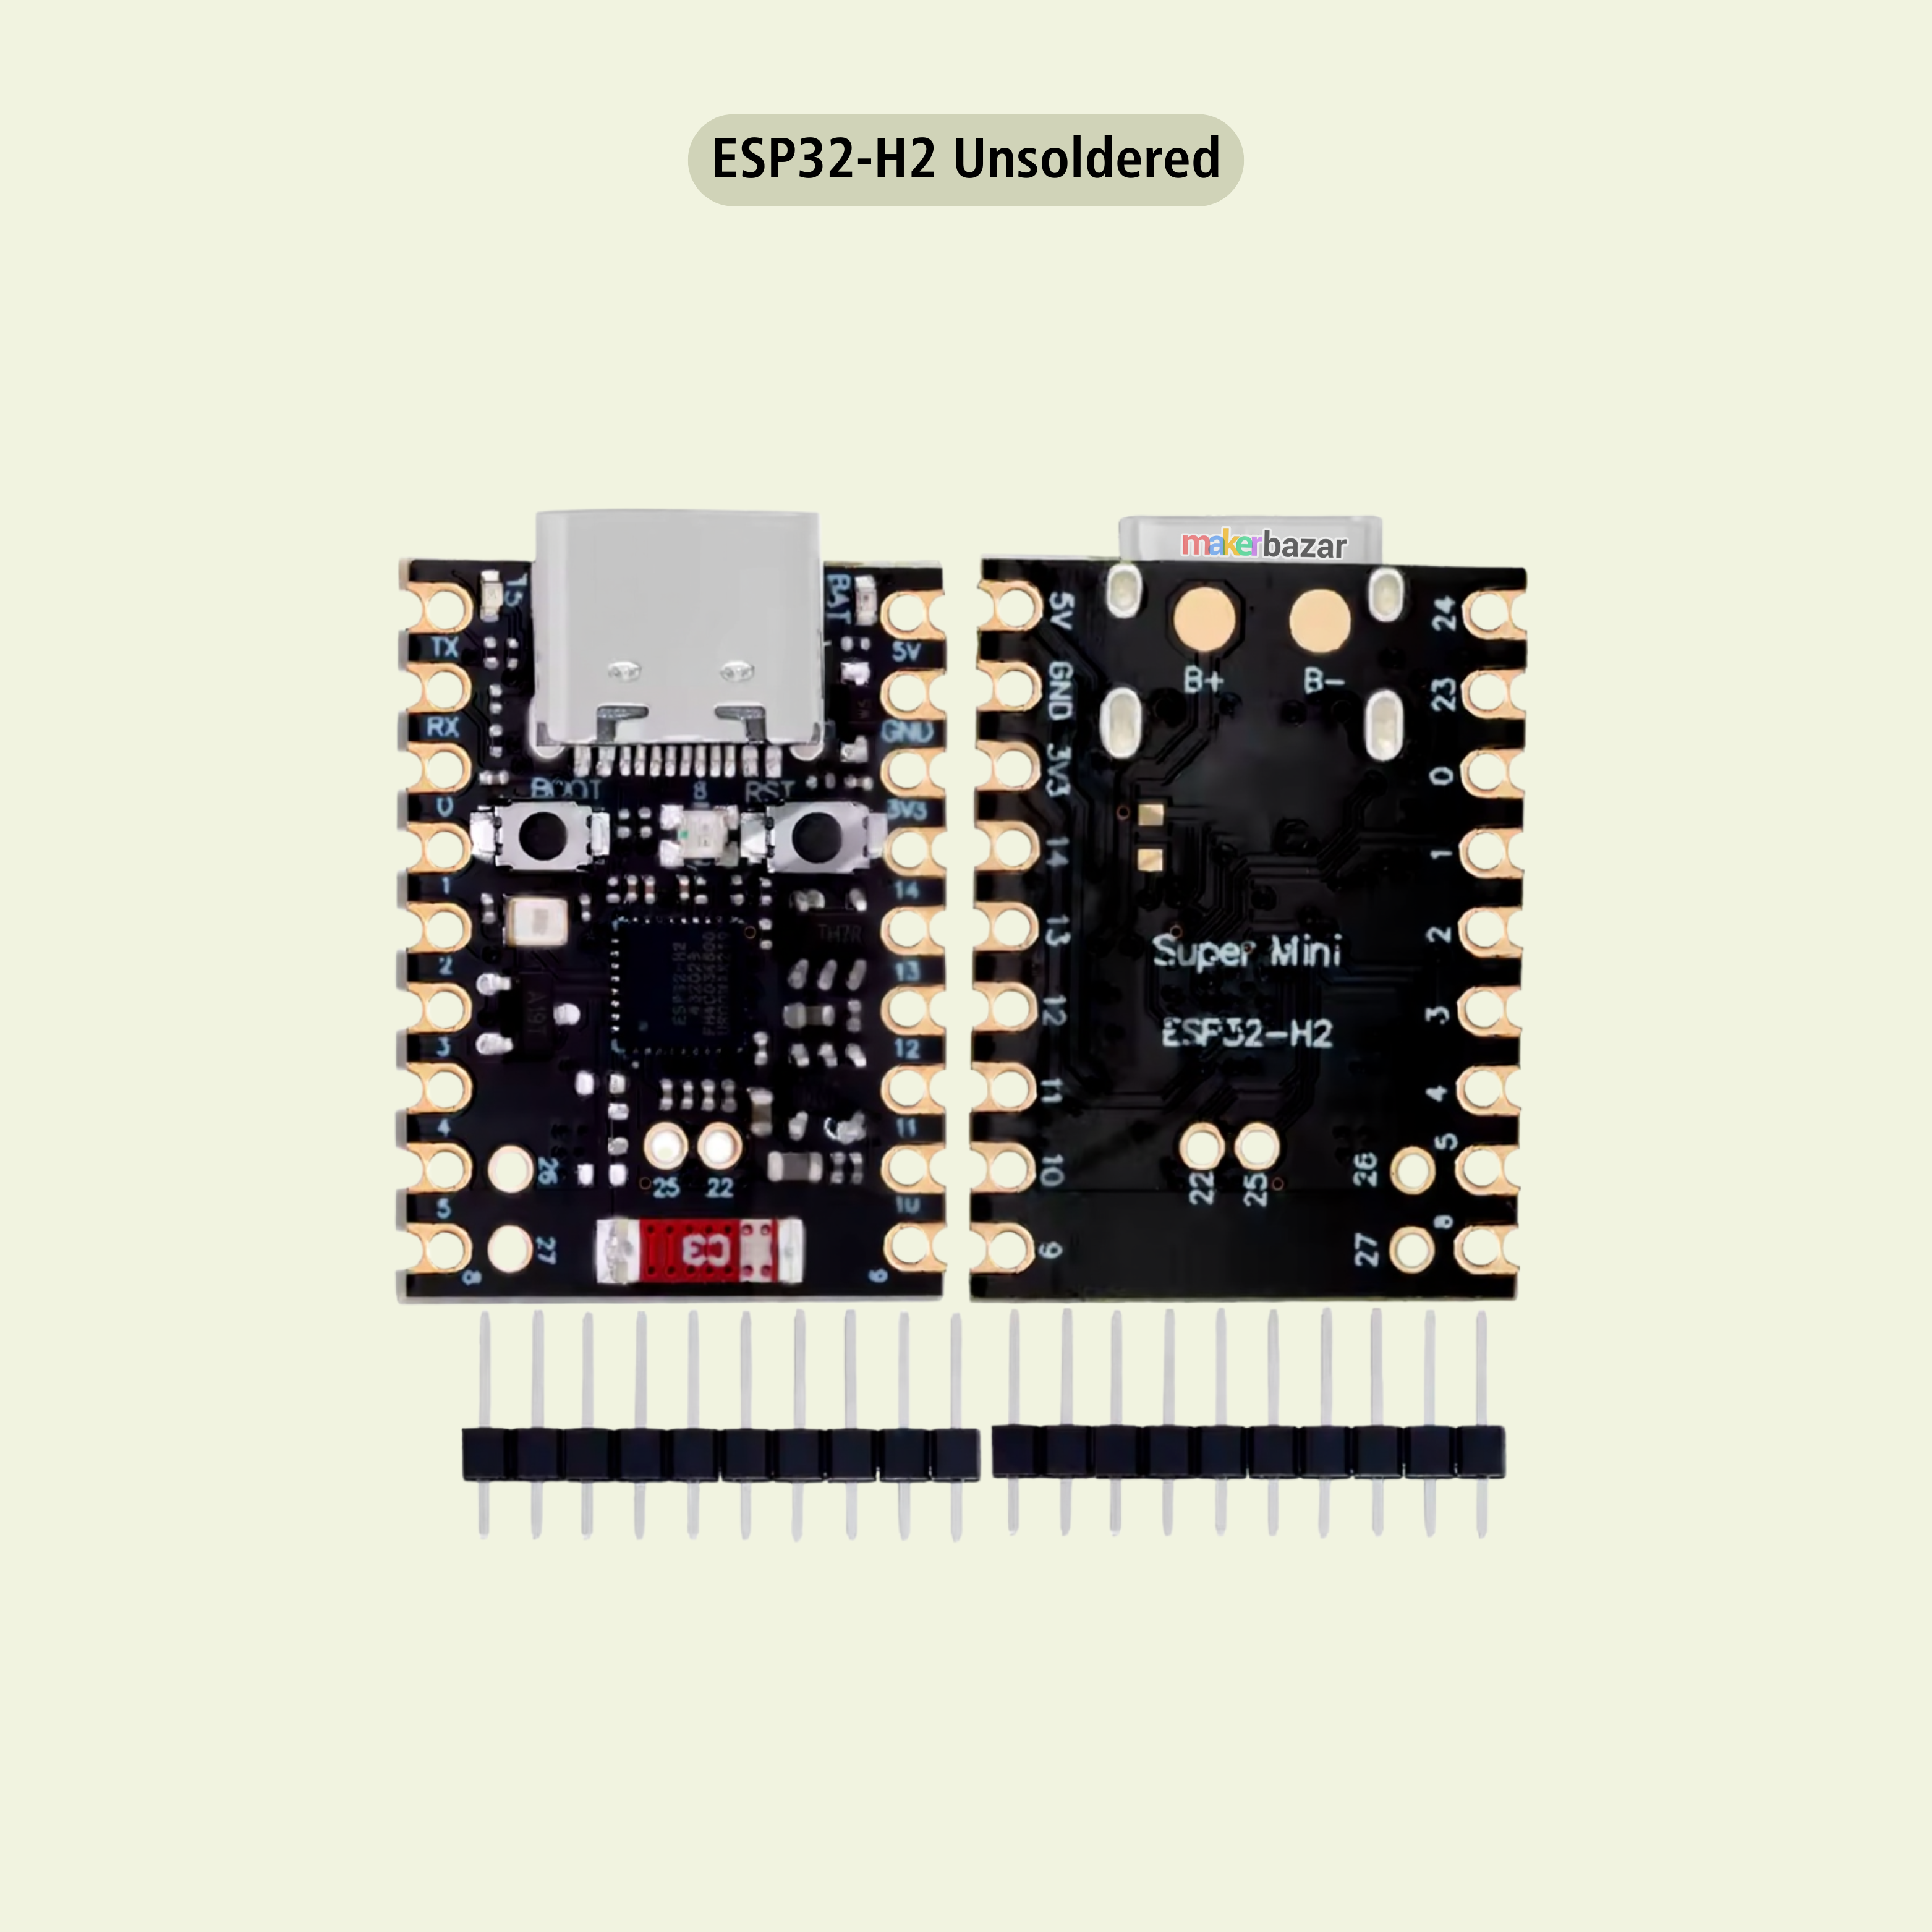
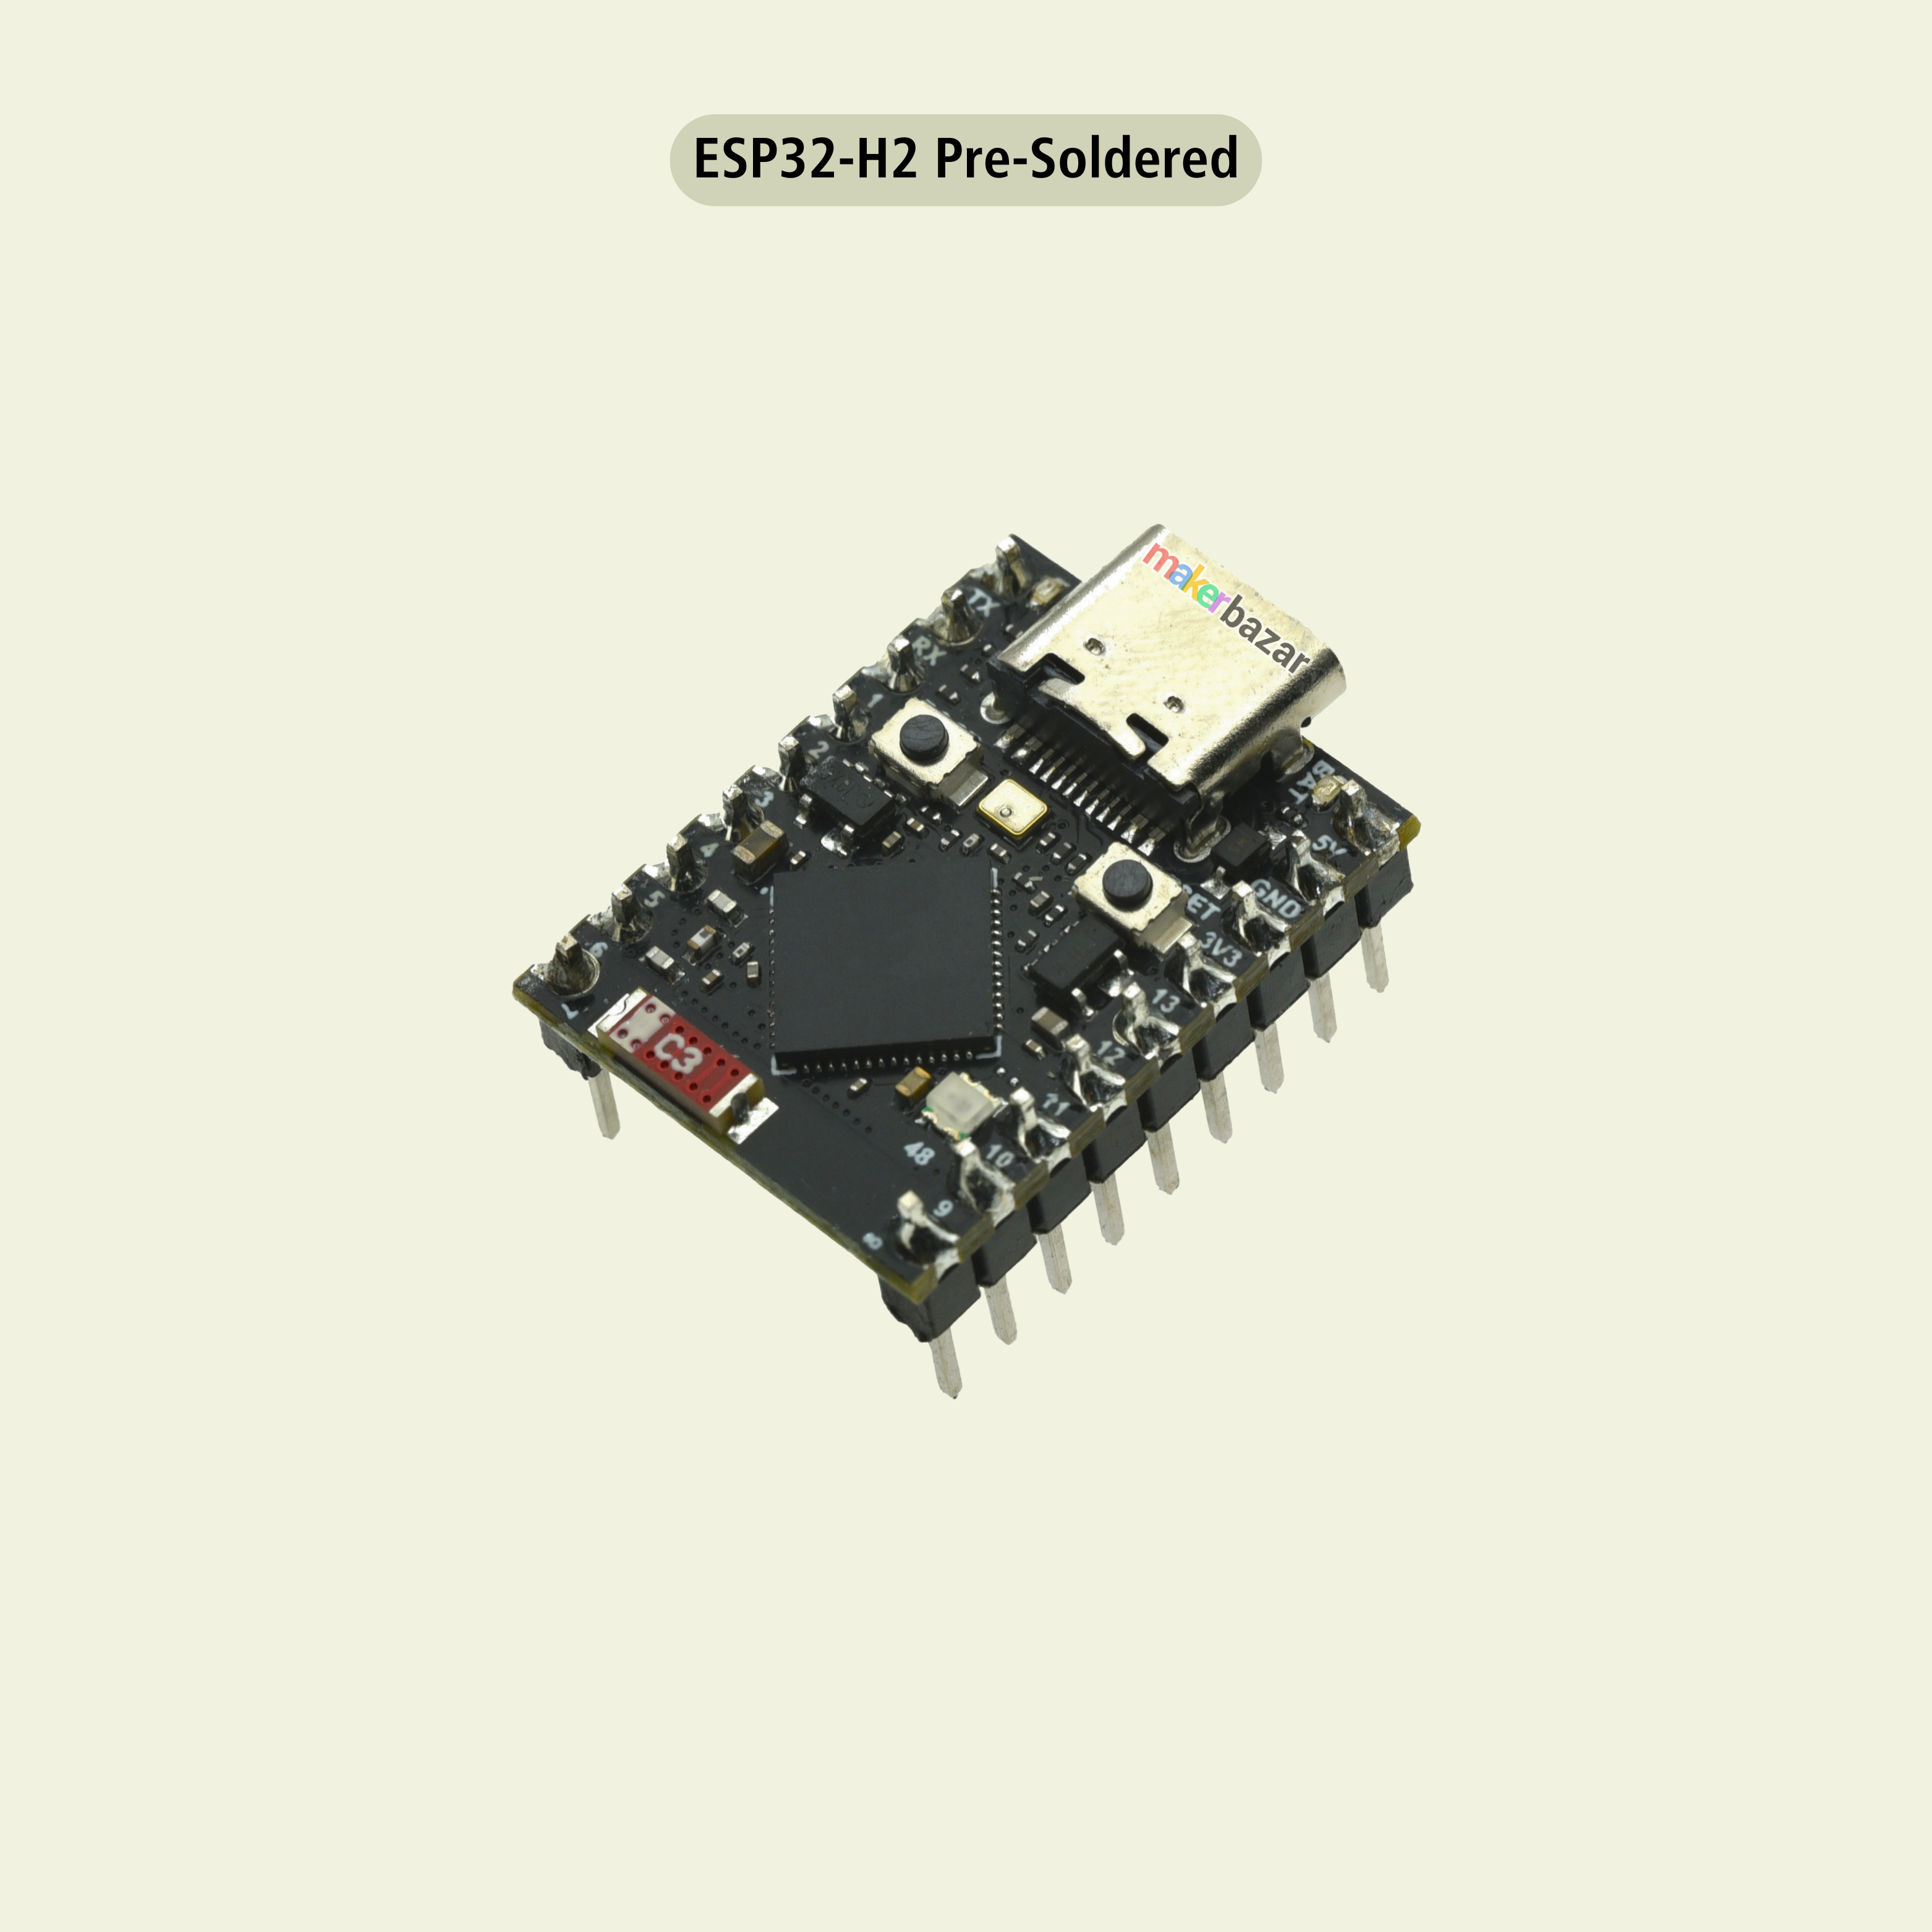
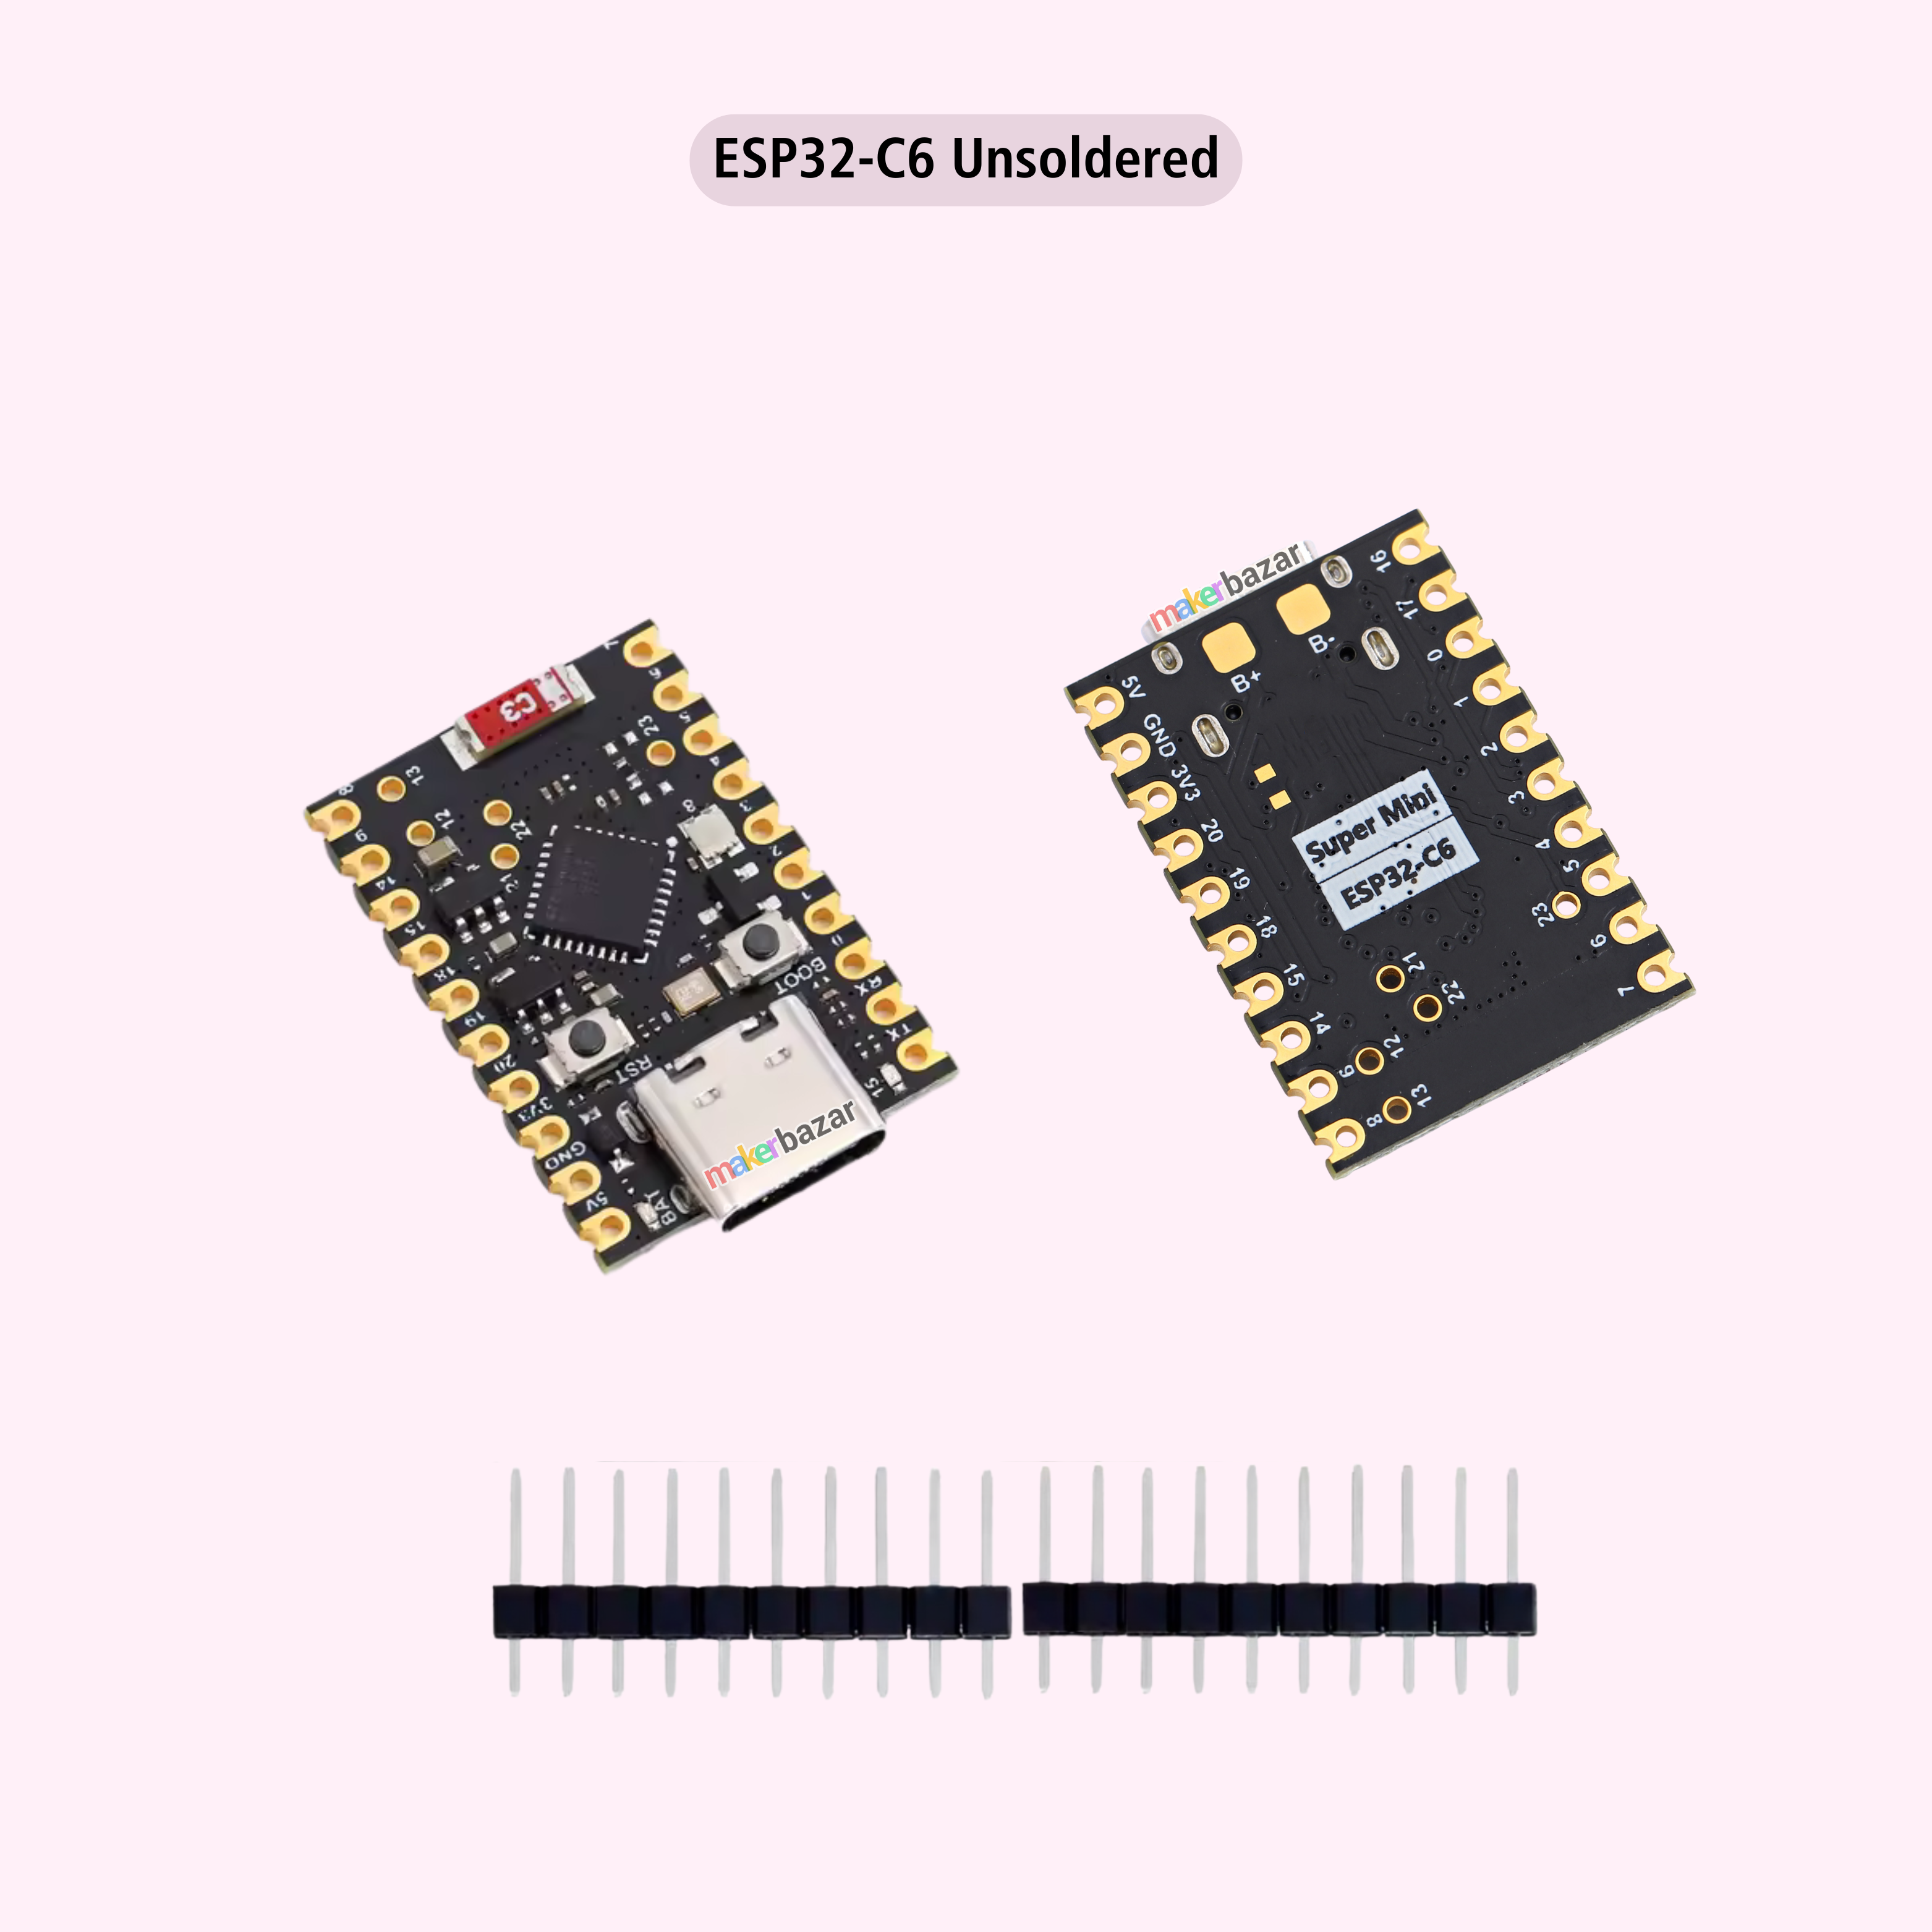
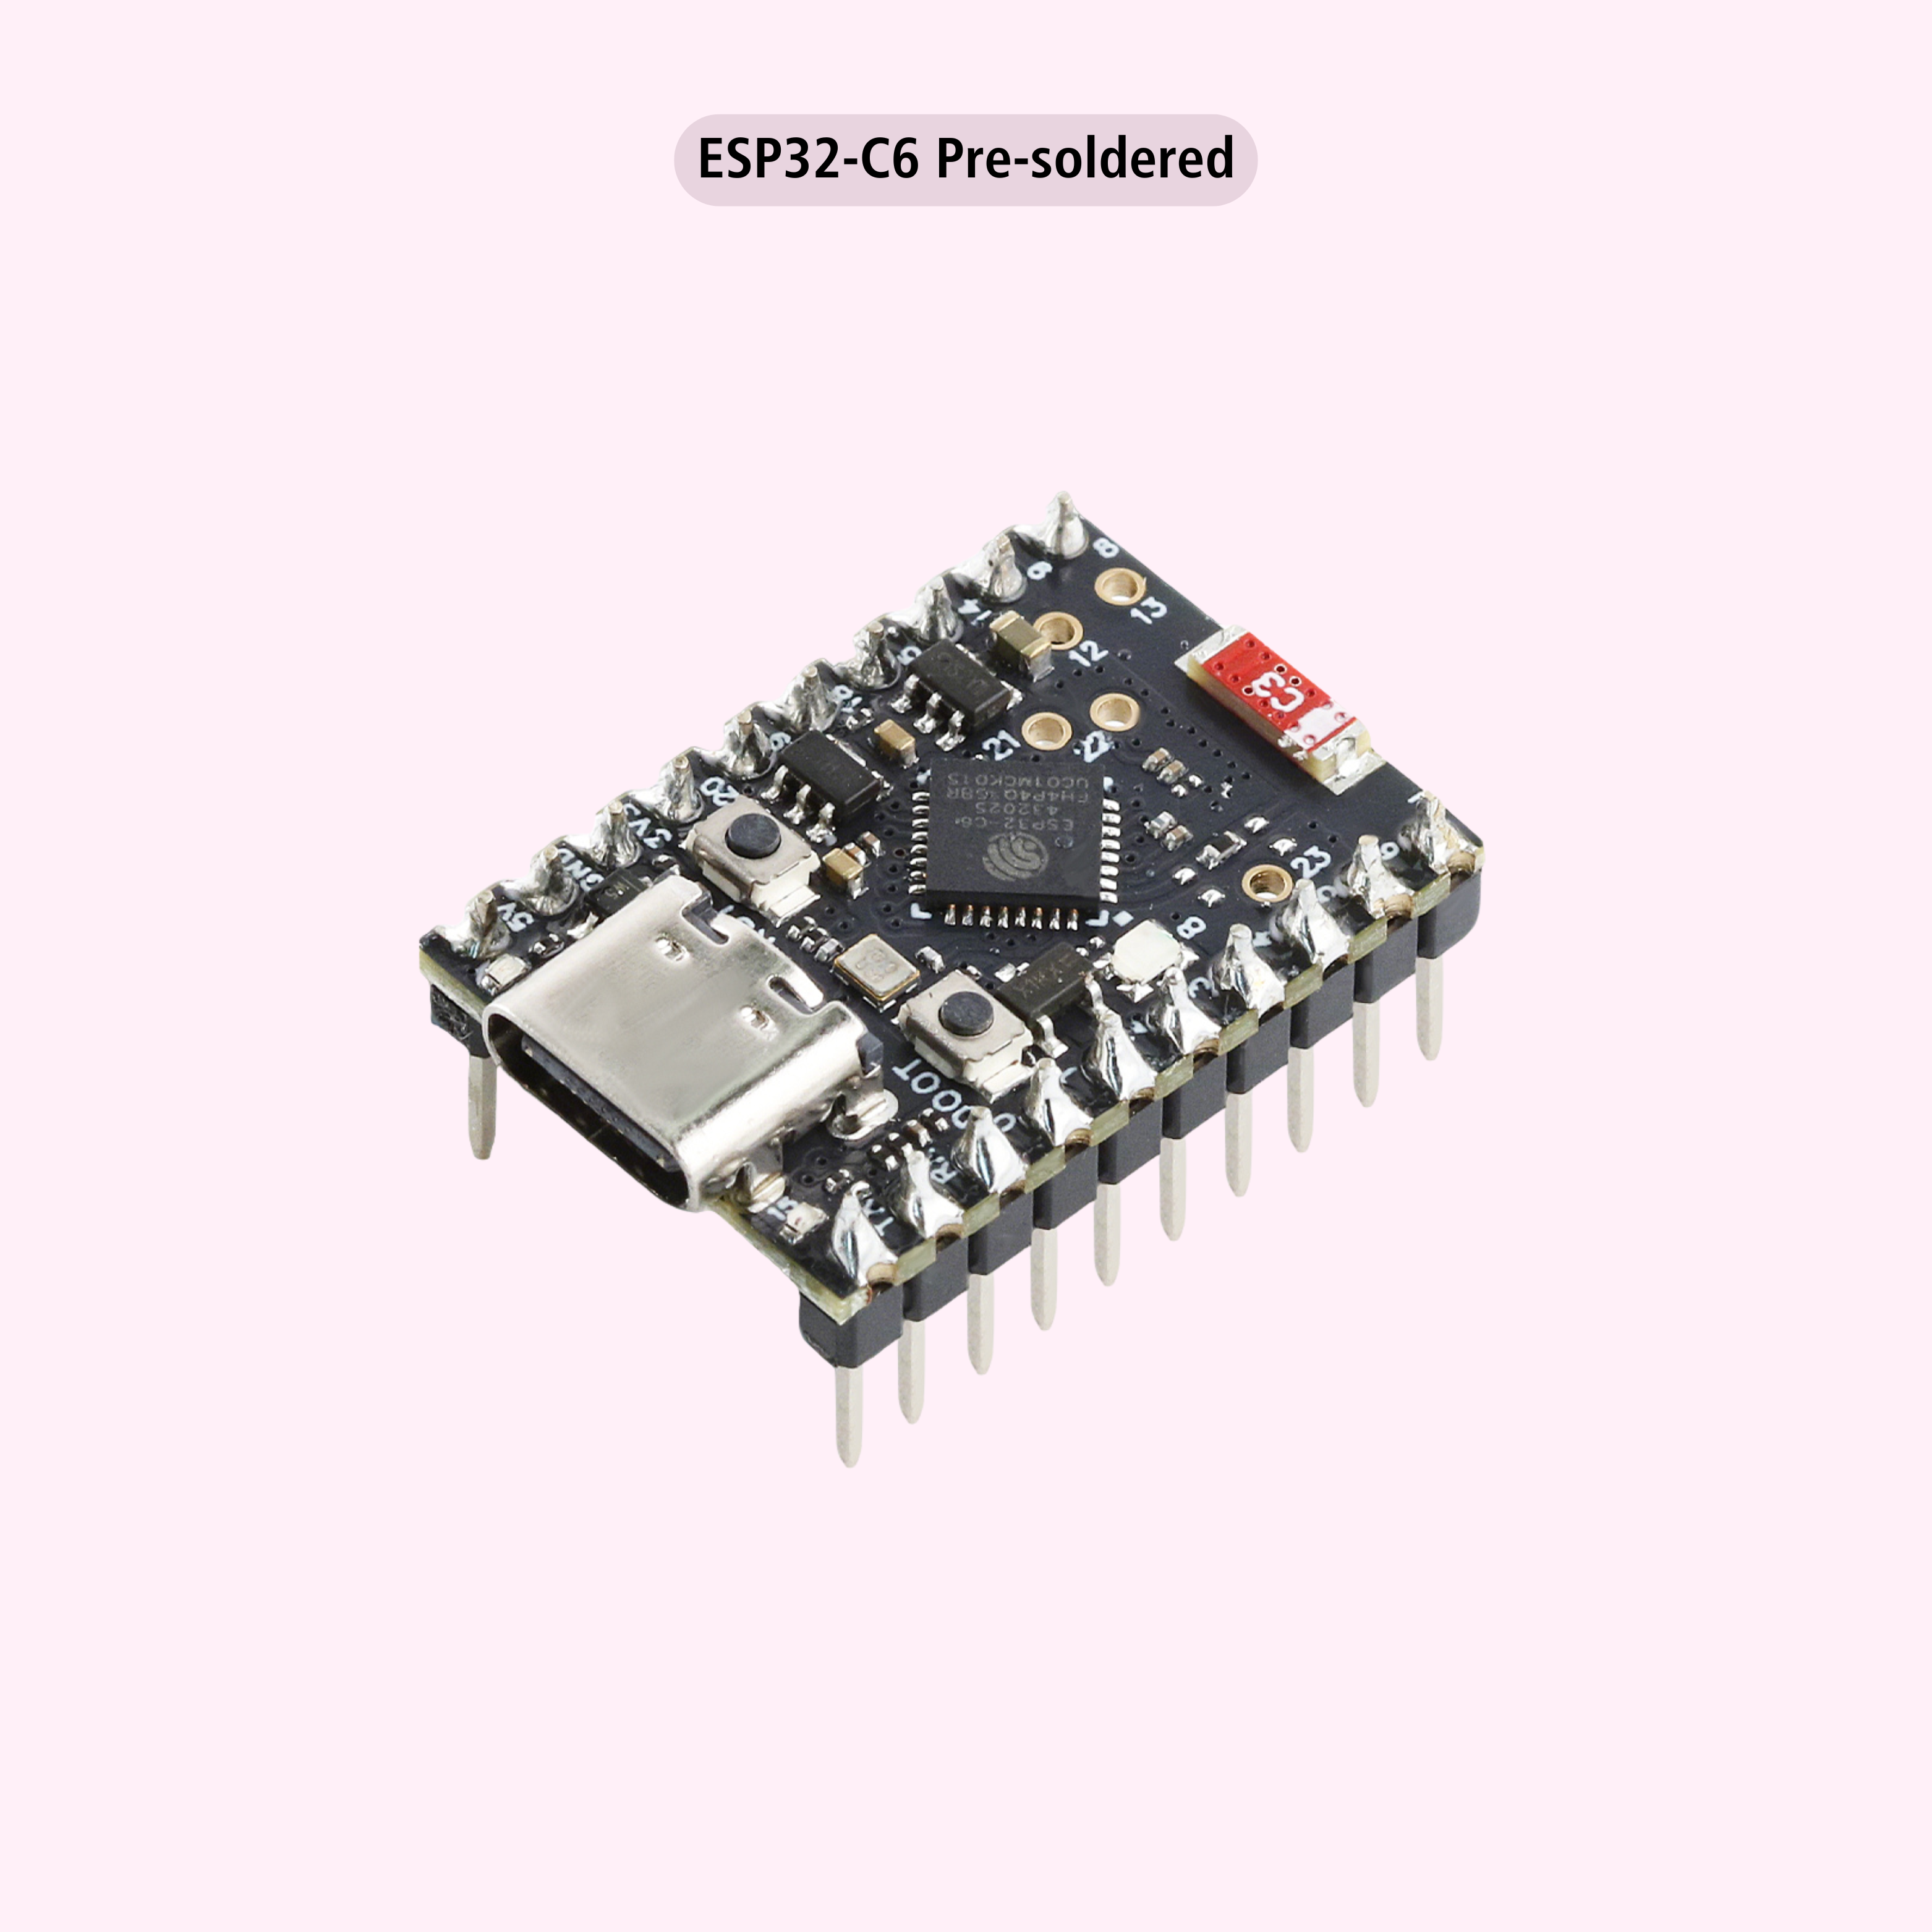
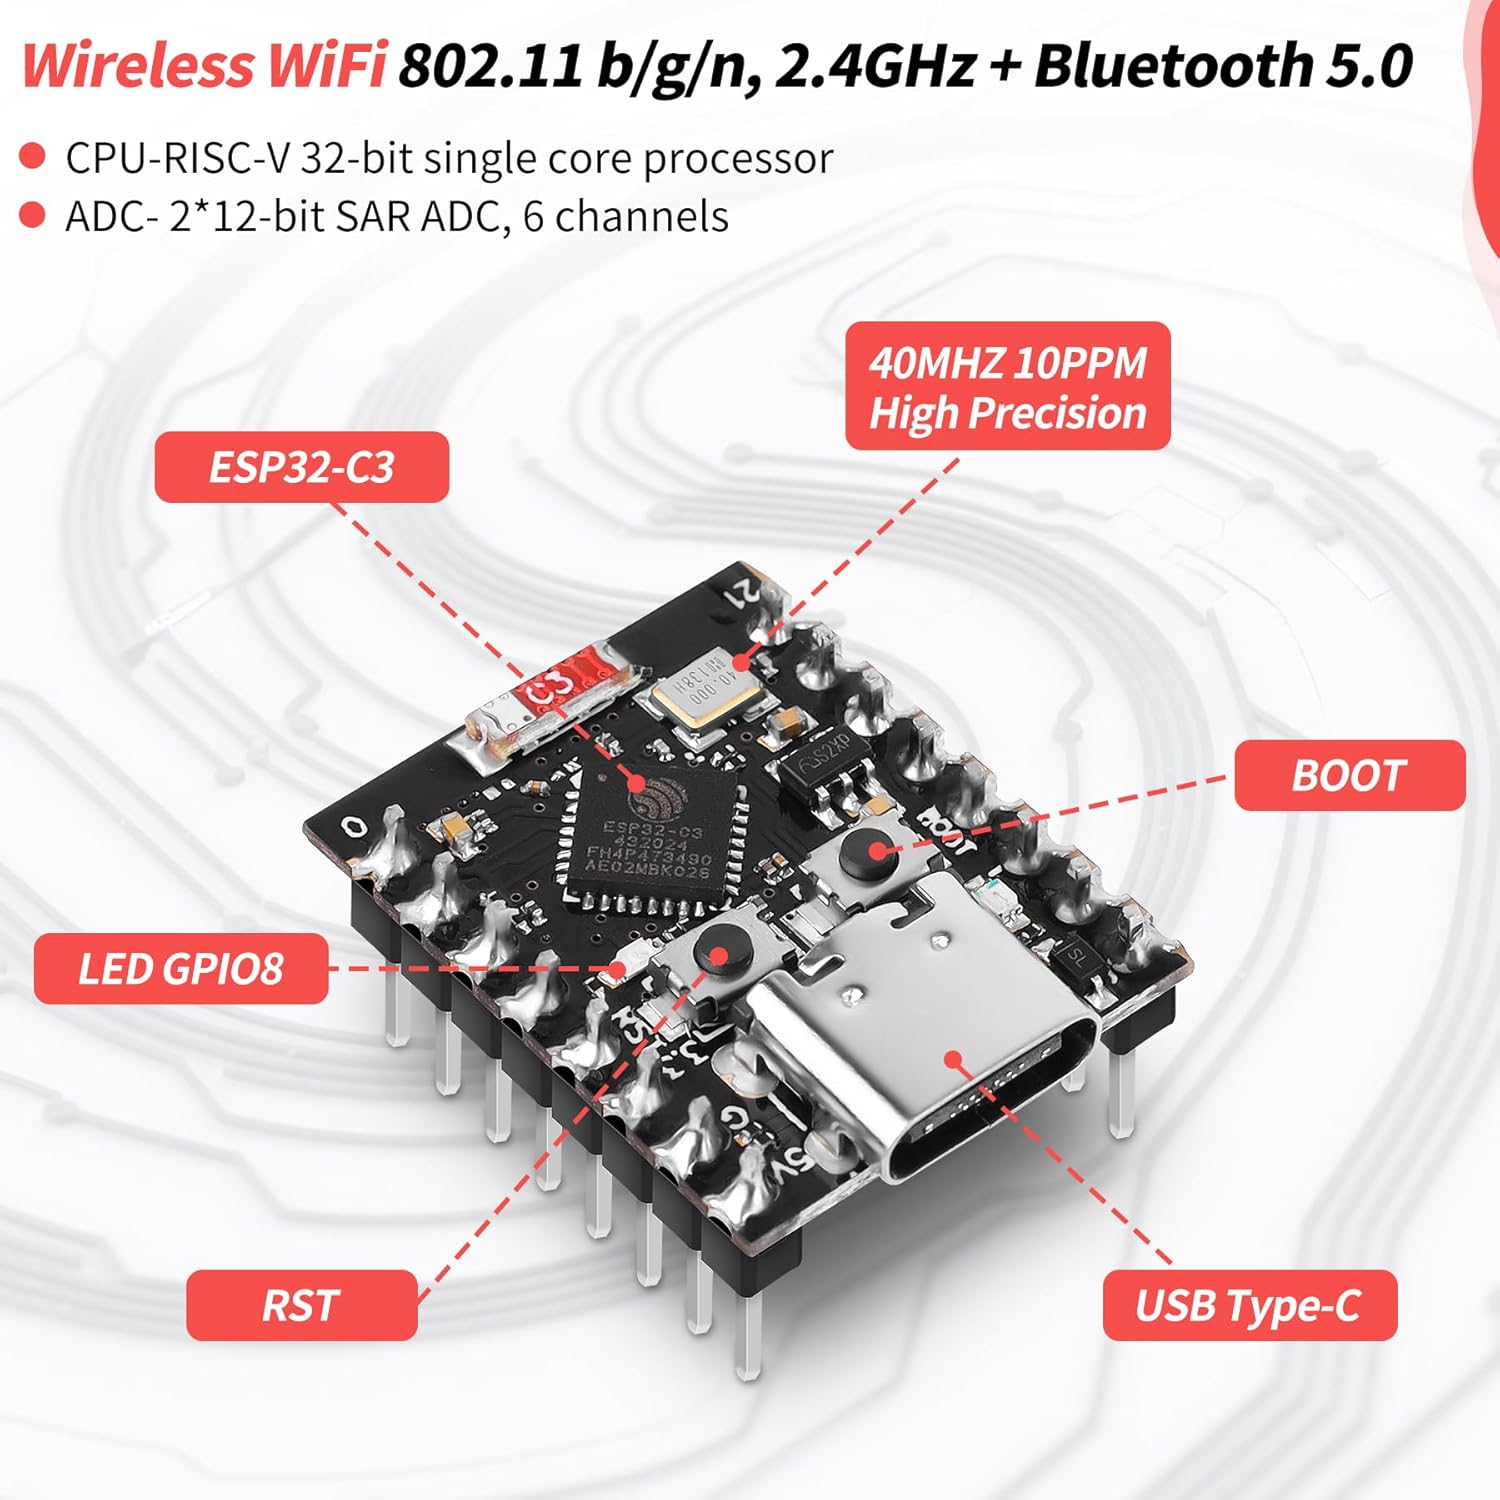
The ESP32 Supermini Development Board series offers high-performance wireless microcontroller solutions in an ultra-compact form factor. Available in ESP32-C3, ESP32-S3, ESP32-H2, and ESP32-C6 variants, these boards are designed for low-power IoT, smart wearables, home automation, and embedded system development.
Each variant delivers reliable processing, integrated WiFi and/or Bluetooth, rich GPIO support, and advanced security features. With support for Arduino IDE and ESP-IDF, these boards are perfect for beginners, students, and professional developers looking for compact yet powerful wireless platforms.
Key Features:
-
Multiple variants: ESP32-C3, ESP32-S3, ESP32-H2, ESP32-C6
-
Built-in WiFi and Bluetooth / Bluetooth LE (variant dependent)
-
Compact Supermini form factor for space-constrained projects
-
Powerful 32-bit processors (Xtensa or RISC-V)
-
Ultra-low power consumption with deep sleep support
-
External antenna support for improved RF range
-
Rich GPIO, ADC, PWM, UART, I2C, and SPI interfaces
-
Advanced security with hardware encryption & secure boot
-
Supports Arduino IDE and ESP-IDF
Technical Specifications:
| Specification | ESP32-C6 SuperMini | ESP32-H2 SuperMini | ESP32-C3 SuperMini | ESP32-S3 SuperMini |
|---|---|---|---|---|
| SoC | ESP32-C6FH4 | ESP32-H2 | ESP32-C3 FN4 | ESP32-S3FH4R2 |
| CPU Architecture | 32-bit RISC-V | 32-bit RISC-V | 32-bit RISC-V | Xtensa® LX7 |
| CPU Cores | Single-core | Single-core | Single-core | Dual-core |
| Max CPU Frequency | 160 MHz | 96 MHz | 160 MHz | 240 MHz |
| SRAM | 512 KB HP + 16 KB LP | 320 KB | 400 KB | 512 KB |
| ROM | 320 KB | 128 KB | 384 KB | 384 KB |
| PSRAM | 512 KB HP SRAM | 0 | 0 | 2 MB |
| Flash Memory | 4 MB | 4 MB | 4 MB | 4 MB |
| Wi-Fi | Wi-Fi 6 (802.11ax) | No | Wi-Fi 4 (802.11 b/g/n) | Wi-Fi 4 (802.11 b/g/n) |
| Bluetooth | Bluetooth 5.3 (LE) | Bluetooth 5.2 (LE, Mesh) | Bluetooth 5.0 (LE) | Bluetooth 5.0 (LE) |
| IEEE 802.15.4 | Zigbee 3.0, Thread | Zigbee, Thread | No | No |
| Matter Support | Yes | Yes | No | No |
| GPIO Count | 11 Digital I/O | 19+ GPIO | 11 GPIO | 11–17+ GPIO |
| ADC Inputs | 6 | Supported | 4 × 12-bit | 4 |
| PWM | 11 Channels | LED PWM | Supported | Supported |
| Other Peripherals | SPI, UART, I2C, I2S, RMT, GDMA | SPI, UART, I2C, I2S, RMT, GDMA | SPI, I2C, UART | SPI, I2C, UART |
| USB Interface | USB Type-C | USB Type-C | USB Type-C (Serial/JTAG) | USB Type-C |
| Input Voltage | 5V (VIN / USB) | 4.5V–5.5V | 3.3V–6V | 3.3V–6V |
| Deep Sleep Current | ~15 µA | Low-power modes | ~43 µA | ~43 µA |
| Onboard LED | RGB LED (GPIO8) | RGB LED | Blue LED (GPIO8) | WS2812 RGB LED |
| Buttons | Reset & Boot | Reset & Boot | Reset & Boot | Reset & Boot |
| Antenna | Ceramic Antenna | PCB Antenna | PCB Antenna | Ceramic Antenna |
| Mounting Style | Stamp-hole, SMD | Compact PCB | Single-sided SMD | Compact PCB |
| Dimensions (mm) | ~23 × 17.8 | ~25 × 18 × 4 | 22.52 × 18 | 22.52 × 18 |
| Ideal Use Cases | Smart Home, Matter, Battery IoT | Matter, Thread/Zigbee Devices | Wearables, Low-Power IoT | Wearables, AIoT, USB Devices |
Applications:
-
IoT devices and smart sensors
-
Wearable electronics
-
Home automation systems
-
Wireless control and monitoring
-
Battery-powered embedded projects
-
Industrial and consumer IoT
-
Educational and learning platforms
-
Rapid prototyping and R&D
Precautions:
-
Operate within recommended voltage limits only
-
Use a proper antenna for the best wireless performance
-
Avoid short circuits on GPIO pins
-
Disconnect power before soldering
-
Handle with ESD protection
Note For ESP32-S3:
External power supply: If an external power supply is required, simply connect the + terminal of the external power supply to the B+ position on the back of the board, and connect the negative terminal to the B- on the back. (Supports 3.3 ~ 6V power supply). The battery can be charged by connecting a USB.
Note: When welding, please be careful not to short-circuit the positive and negative poles, which may damage the battery and the device. The COM port cannot be recognised on the Arduino
Enter the download mode:
Method 1: Hold down the BOOT to power on.
Method 2: Press and hold the BOOT button of the ESP3253, then press the RESET button, release the RESET button, and then release the BOOT button. At this point, the ESP3253 will enter the download mode. Each time you connect, you need to re-enter the download mode. Sometimes, after pressing it once, if the port is unstable, it will disconnect. You can determine this by recognizing the sound on the port.
The program cannot run after uploading:
After the upload is successful, you need to press the Reset button once before it will be executed.
When plugged into the computer, the Com port is not displayed. Instead, it shows (JTAG/serial debug unit).
Display the JTAG/serial debug unit solution
The ESP3253SuperMini Arduino serial port fails to print. The USB CDC On Boot in the toolbar needs to be set to Enabled
Pinout: ESP32-S3
 Pinout: ESP32-C3

 Pinout: ESP32-C6
 Pinout: ESP32-H2
